
Use this room-by-room pest inspection checklist to spot the signs that actually matter and to get your property ready for a professional pre-purchase inspection. It walks through what to check in every part of a home, flags which findings need a licensed technician right away, and explains how the work aligns with AS 4349.3 and AS 3660.2, the two Australian Standards that govern timber pest and termite inspections. Treat it as a first pass, not a substitute for a standards-compliant report from a licensed pest management firm.
TL;DR:
- Mud tubes, hollow timber, or crumbling mud trails indicate active termite activity requiring immediate professional inspection.
- Gaps in roof access, blocked subfloor vents, or stored items prevent thorough pest assessments and should be disclosed in the report.
- Visual signs like fresh frass, gnaw marks, or spider wings suggest recent pest activity, while dry evidence may indicate past or inactive infestations.
- Combining building and pest inspections provides a more comprehensive risk assessment, especially for inaccessible areas that may hide ongoing damage.
- Regular homeowner monitoring and preparation before inspections help ensure more accurate results and reduce hidden risks.
Table of Contents
- Home Pest Inspection Checklist by Room
- What Mud Tubes, Frass, and Droppings Actually Tell You
- AS 4349.3 vs AS 3660.2: Which Inspection Do You Need?
- Getting Your Property Ready for Inspection Day
- Building a DIY Monitoring Routine Between Professional Checks
- What a Licensed Inspector Adds to the Process
- Why No Inspection Can Check Everything
- An Inspector’s View on What Reports Really Tell You
- Book a Standards-Compliant Inspection With Bugspatrol Pest Management
- Standards and Guidance Worth Checking Yourself
- Sources
Home Pest Inspection Checklist by Room
Every area of a house tells a different part of the story. Termites favor damp, dark, timber-rich zones; rodents go for warm voids near food; borers leave their own calling cards in structural framing. Working through the property systematically, area by area, catches problems a quick walk-through misses.
Exterior and perimeter. Walk the full foundation line and note anything touching the building that shouldn’t be. Look for soil piled against timber cladding, mulch banked significantly up an external wall, or garden beds graded so they cover weep holes. Weep holes need to stay open and visible; a bricklayer’s weep hole packed with dirt is one of the most common ways moisture and termites find a way in unnoticed. Check for vegetation branches or vines making direct contact with the walls or roofline, and scan render, brick, and stumps for mud tubes, which are pencil-width trails termites build to travel between soil and timber.
Roof and roof void. From a ladder or the manhole, look for broken or sagging timber, water staining on rafters or sarking, disturbed or compressed insulation, and discarded insect wings collected near light fittings or in cobwebs. If the roof void is boxed in, insulated to the point of blocking a clear view, or simply not accessible on the day, note that explicitly. It matters for the report later.

Subfloor and crawlspace. This is where a lot of quiet damage happens. Check bearers and joists for a hollow sound when tapped, look for shelter tubes running up piers or brick piers, feel for damp patches, and check that subfloor vents aren’t blocked by garden beds, decking, or stored items. Stored offcuts of timber sitting directly on the dirt are an open invitation.
Kitchen and pantry. Pull out what you safely can and check behind the fridge and stove for droppings, gnaw marks on skirting or cupboard corners, and torn food packaging. Grease rubs, the dark greasy smear rodents leave along a regular travel path, often show up along skirting boards near the pantry.
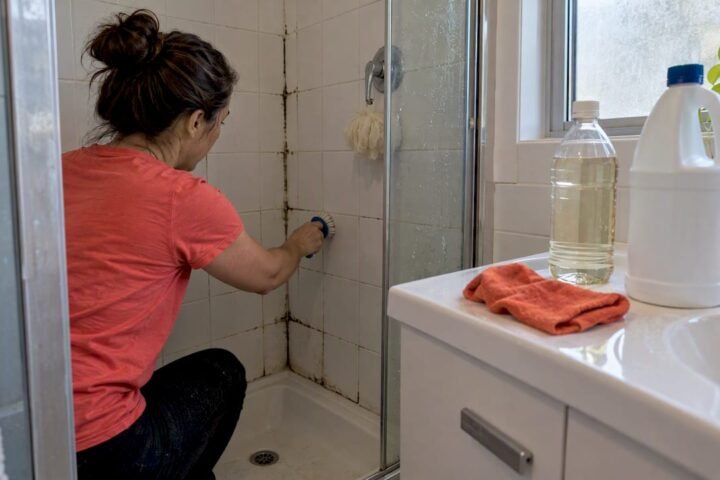
Bathrooms and laundry. Check around shower bases, bath frames, and under the vanity for softened timber, fungal staining, or gaps that have opened up at the skirting or tile edge. Persistent leaks create exactly the moisture termites and borers need.

Bedrooms and living areas. Tap skirting boards for a hollow sound, look for small exit holes in furniture or door frames, and check for frass, fine sawdust-like droppings borers push out of their tunnels.
Garage and outbuildings. Look for stored timber in ground contact, rodent nesting material in corners, and any old bait stations or drill holes from a previous treatment, since these tell you the property has a pest history worth asking about.
- Photograph every finding with a date stamp and a short note on location.
- Rate each item as “monitor” (note it, recheck next visit) or “urgent” (call a licensed inspector before proceeding).
- Mud tubes, hollow timber, and discarded wings are always urgent, never monitor-only.
Pro Tip: Keep a single folder, digital or physical, for every photo and note from every inspection. When you eventually talk to a technician or a real estate agent, having a dated history of a stain or a gap is worth more than trying to describe it from memory.
What Mud Tubes, Frass, and Droppings Actually Tell You
Not every mark on a wall means trouble, but a few signs deserve immediate attention no matter where you find them. Mud tubes, discarded wings near windows or light fittings, and structural timber that sounds hollow when tapped are the clearest indicators of active or recent termite activity, and none of them belong on a “keep an eye on it” list.
Rodent and general insect evidence tends to be more about degree than urgency. Droppings that are dark, moist, and clustered near a food source usually mean a live, active population; droppings that are dry, faded, and scattered may be old. Grease rubs, chewed cupboard corners, and shredded nesting material all point to rodents, while a scattering of loose wings on a windowsill is a classic termite tell most homeowners walk right past.
Fresh evidence has a texture to it: damp frass, sharp-edged gnaw marks, or a mud tube that crumbles wet under a light touch all suggest activity within days or weeks. Old evidence is dry, brittle, and often dusty, meaning the colony or pest may have moved on, though that is never a guarantee it won’t come back.
- Fresh mud tube: moist, pliable, rebuilds quickly if broken.
- Old mud tube: dry, brittle, stays broken.
- Dark, clustered droppings: recent rodent activity nearby.
The uncomfortable truth is that a purely visual check can miss activity happening inside a wall cavity or under a concrete slab with no accessible edge. That’s the concealed-risk scenario every buyer should ask about directly, because a clean-looking inspection doesn’t mean a clean structure.
AS 4349.3 vs AS 3660.2: Which Inspection Do You Need?
Two different standards cover two different jobs, and mixing them up leads to the wrong report at the wrong time. AS 4349.3 governs pre-purchase timber pest inspections, a one-off visual assessment done before a property changes hands. AS 3660.2 covers annual termite-only inspections for a property you already own, meant to catch new activity year over year.
A compliant pre-purchase report, guided by the AEPMA Code of Practice, should include:
- A plain-English summary of findings and overall risk.
- Photographic evidence tied to specific locations.
- A clear statement of any areas that couldn’t be accessed.
- Recommendations for further action, including whether an invasive or specialist inspection is warranted.
If a general inspection flags suspicious timber or a wall cavity that couldn’t be checked, ask for a Specialist Timber Pest Inspection before you commit. Buyers heading to auction should book this well ahead of time, since there’s no cooling-off period to fall back on afterward, while private treaty purchases usually allow a short window during the cooling-off period to arrange it. Either way, budget for possible remediation before you negotiate, not after settlement.
Getting Your Property Ready for Inspection Day
An inspector can only report on what they can reach, so preparation directly affects how useful the final report is.
- Clear the roof manhole of stored boxes and make sure the ladder access point is unobstructed.
- Unlock all gates, garages, sheds, and any locked internal doors ahead of time.
- Move potted plants, garden edging, and stored timber away from slab edges and weep holes.
- Clear heavy items blocking subfloor vents or crawlspace hatches.
- Gather keys, past pest treatment records, and any photos of suspect areas you’ve already noticed.
- Write a short list of known leaks, past water damage, or previous pest issues to hand the inspector.
Buyers often overlook roof void and subfloor access, and those are exactly the zones where termites do their quietest work. If an area genuinely can’t be cleared in time, tell the inspector before they arrive so the limitation gets recorded properly in the report rather than glossed over. A report that openly states “subfloor access restricted by stored goods” is more trustworthy than one that says nothing at all.
Building a DIY Monitoring Routine Between Professional Checks
A monthly walk around the perimeter, a closer quarterly look at the roof void and subfloor, and at least one full professional inspection every year is a reasonable baseline for most properties. Homes with a history of termite activity, heavy garden coverage against the walls, or timber stumps instead of a concrete slab should tighten that to twice a year.

The tools worth owning are simple: a high-lumen torch for roof voids and subfloors, a phone camera set to date stamp, a basic moisture meter, a magnifying glass for close inspection of frass and droppings, and a pair of gloves. Flashlights, moisture meters, cameras, and magnifiers cover almost everything a homeowner needs for a visual check.
Thermal imaging and invasive probing sit outside that DIY range. These are professional-grade tools that detect moisture and activity behind walls and slabs without cutting into anything, but they require training to read correctly and are best left to a licensed technician.
Pro Tip: Label every photo with the room, the date, and a one-line description the moment you take it. Six months later, “kitchen skirting, March 3, small gap widening” is far more useful to an inspector or an insurer than a photo with no context at all.
What a Licensed Inspector Adds to the Process
Licensed pest management firms with extensive experience can interpret signs like hollow-sounding stumps or faint mud tubes with real confidence. Thermal imaging picks up concealed moisture and activity a torch alone can’t reach.
A licensed inspection produces a standards-compliant report with photos, clearly stated limitations, and specific next steps, whether that’s monitoring, spot treatment, or a referral to a builder or engineer. Treatments are chosen with families and pets in mind, and turnaround on a written report is typically fast enough to fit inside a cooling-off period.
Why No Inspection Can Check Everything
A pre-purchase inspection is a visual, non-invasive look at what’s accessible on the day, not an X-ray of the entire structure. Inspectors don’t cut into walls, lift flooring, or move heavy furniture and stored goods, which means anything hidden behind or under those things stays hidden too.
Areas that are commonly inaccessible include roof voids sealed by insulation or lacking a manhole, subfloors blocked by extensions or low clearance, wall cavities behind fixed cabinetry, and any space behind a locked door the owner didn’t open on the day. A compliant report will list these gaps by name rather than pretend they don’t exist, and that list is often the most important paragraph in the whole document.
This is also why combined building and pest inspections, which typically run one to three hours depending on the size of the home, tend to be worth the extra time and cost over a pest-only check. A builder’s eye catches structural clues, like a sagging floor or a cracked slab edge, that point toward moisture or termite problems a pest inspector might approach from a different angle. Neither inspection type promises a pest-free guarantee. What you’re paying for is a documented, professional risk assessment, not a warranty.
If a report comes back with several inaccessible areas noted, that’s not automatically a red flag on the property. It is, however, a strong reason to ask whether a follow-up visit or a partial invasive inspection makes sense before you finalize anything, particularly if the home has stumps, an older subfloor, or a history of past treatment.
An Inspector’s View on What Reports Really Tell You
Working through hundreds of these reports over time, the pattern that stands out most is how often the “limitations” section gets skipped by readers in a rush to see the summary. That section is usually where the real risk lives. A short note and a dated photo from a homeowner, taken months before an inspector ever shows up, has settled more than one disagreement about when a problem actually started.
Treat every inspection report as a risk assessment taken on a single day, not a lifetime guarantee against pests. Questions about a specific finding are always worth raising directly with the technician who wrote the report.
— navin
Book a Standards-Compliant Inspection With Bugspatrol Pest Management
If your checklist turned up mud tubes, hollow timber, or a subfloor you couldn’t fully check, the next move is a proper inspection, not another look with a torch. Professional timber pest inspections often use thermal imaging to check concealed areas a visual pass alone can’t reach, and treatments are chosen with families and pets in mind rather than the strongest chemical on the shelf.

Booking an inspection typically involves confirming access requirements ahead of time, working through the property using a room-by-room approach, and delivering a written report with photos, noted limitations, and clear next steps. If the findings point to active termites, the same visit can lead directly into a termite treatment plan rather than a second appointment weeks later. Readers weighing a purchase with a heavy remediation bill ahead of them may also want to review financing options like the ones covered by Kapvoy’s property-financing guidance before making an offer.
Start by requesting a professional pest control inspection and get a written, standards-based read on exactly what you’re dealing with before settlement day arrives.
Standards and Guidance Worth Checking Yourself
- AS 4349.3: the governing standard for pre-purchase timber pest inspections.
- AEPMA Code of Practice: sets inspection sequence, reporting, and limitation requirements.
- What buyers commonly miss: practical detail on access and report quality.
- Building vs pest inspection scope: how combined inspections compare to pest-only checks.
Sources
- AEPMA Code of Practice — Prior to Purchase Timber Pest Inspections
- Building and pest inspection guide — Australian Property Experts
- Pest inspection clues buyers miss — Owner Inspections
- Seen
Recommended
- Free Home Pest Inspection – Home Inspection Services
- New Home Pest Inspection Wanniassa
- New Home Pest Inspection Casey


[…] are buying, selling or managing a property and need an inspection report. Our pest inspection checklist covers what to […]